
Proper ventilation in bathrooms is essential in preventing mold. Keep your bathroom exhaust vents clean and check their effectiveness using the “tissue test”. Your fan should create enough suction to hold a square of toilet tissue in place while operating. For more information on these methods you can read this article: Cleaning Your Bathroom Exhaust Fan.
If you don’t have an exhaust fan in your bathroom, we recommend having one installed to prevent mold and other issues associated with excess moisture inside the home.
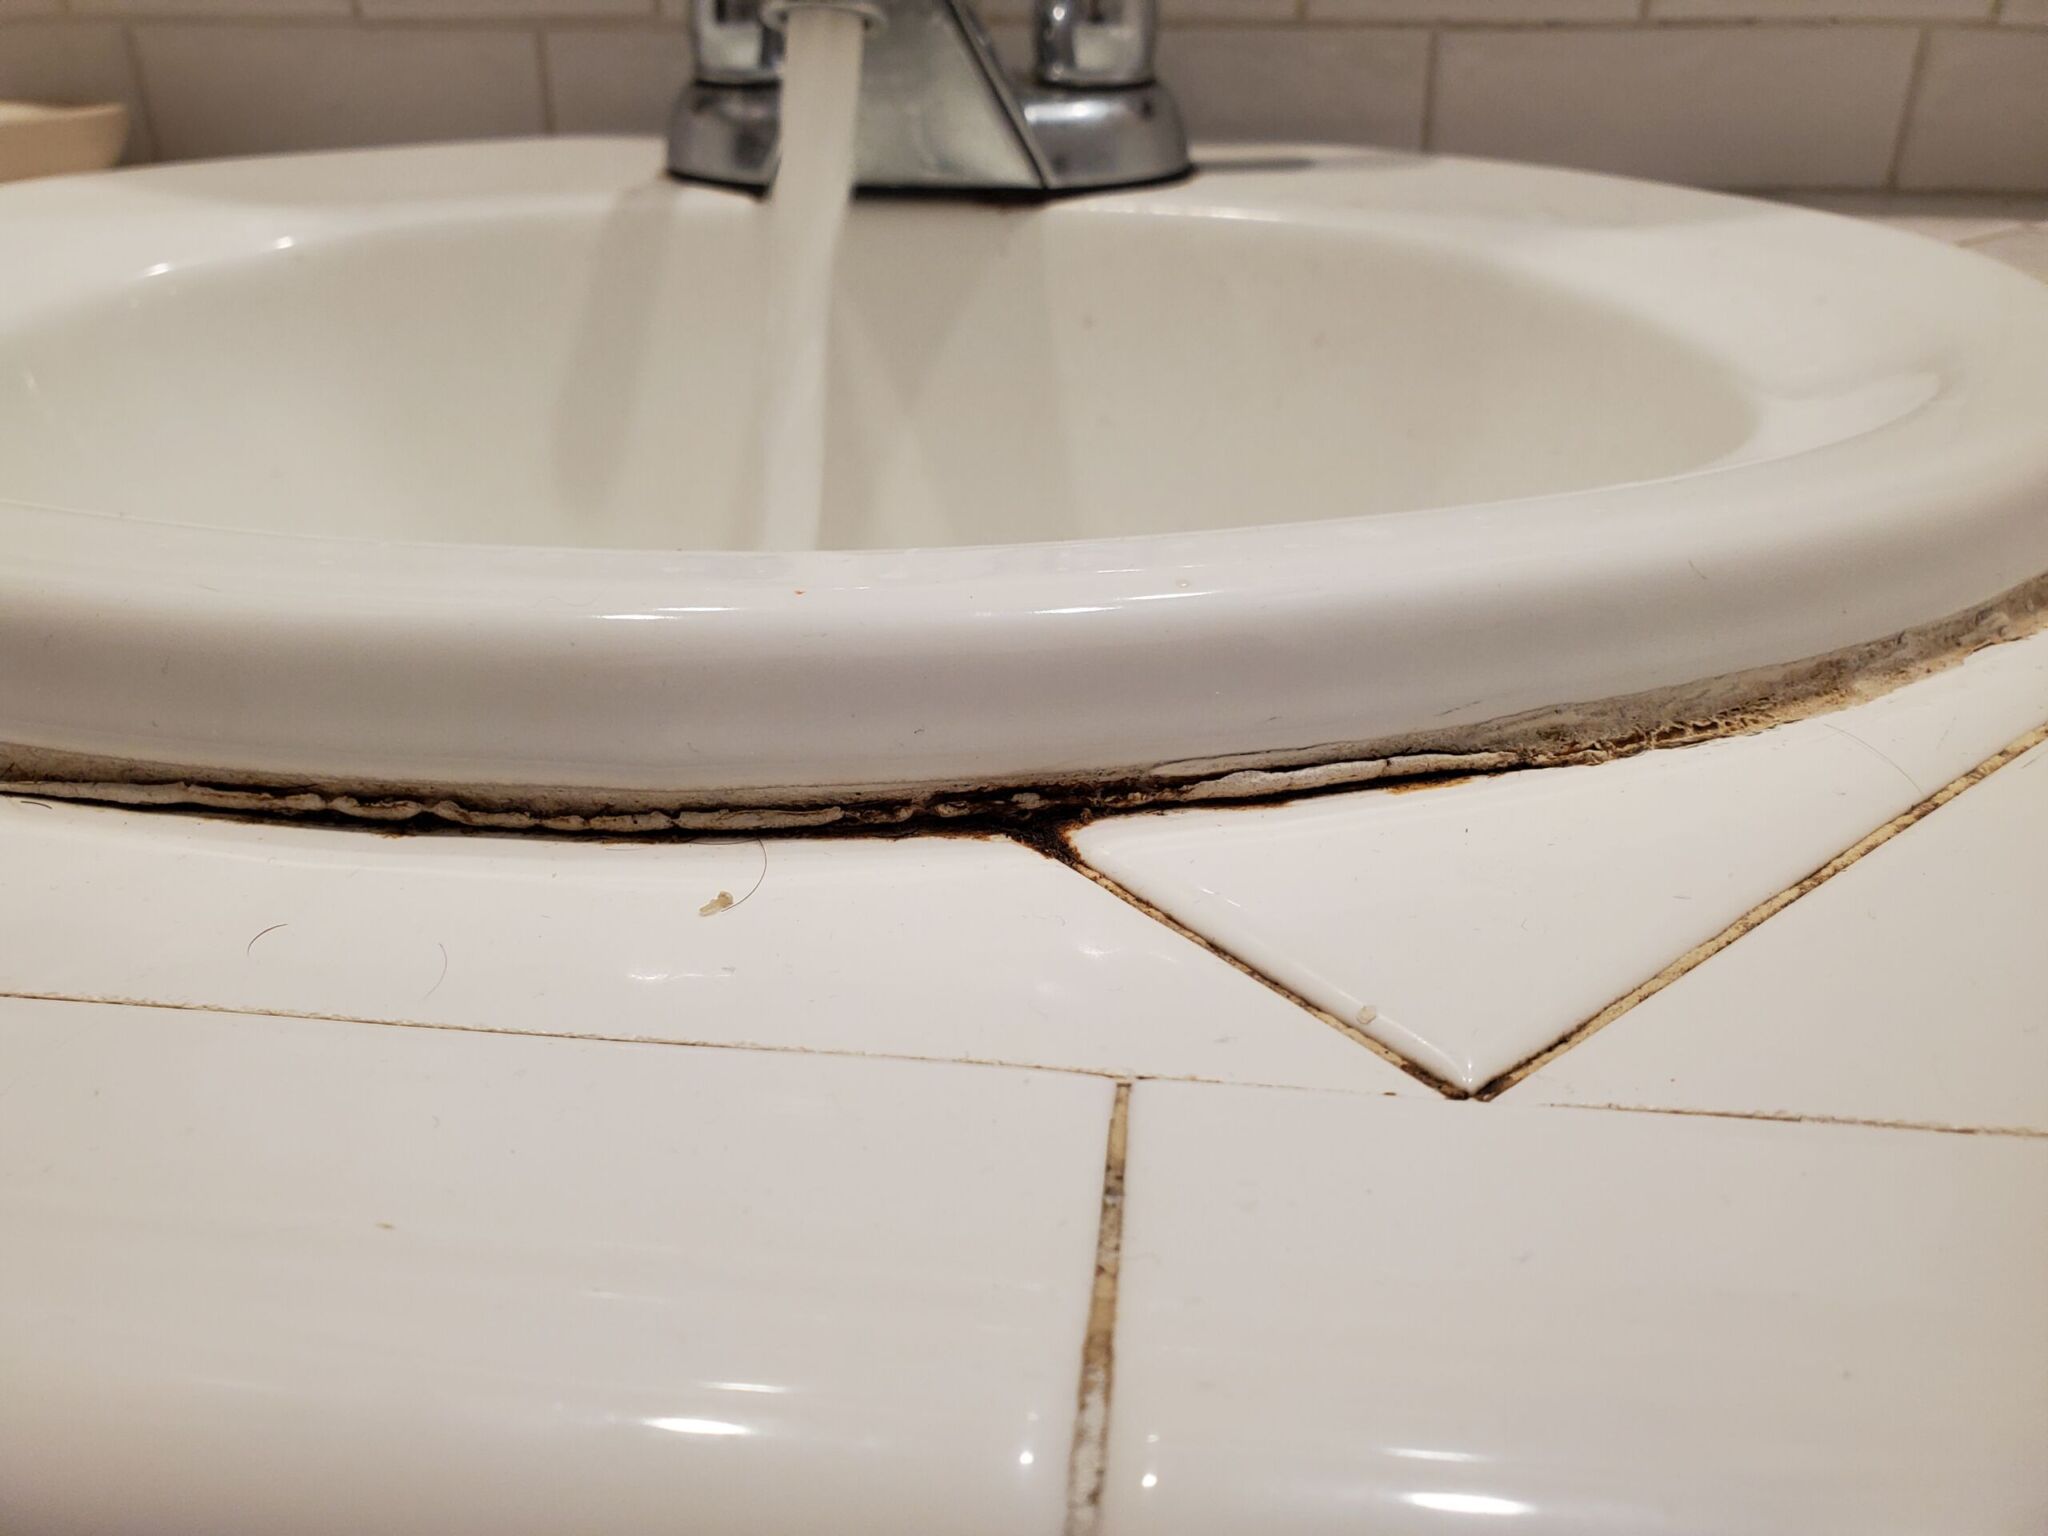
If the mold returns or can’t be removed using the methods described, it’s likely time to replace your sealant. Modern high quality bathroom sealant is often formulated to be mold and mildew resistant and is sometimes guaranteed against mold growth with proper cleaning. Existing sealant can be removed using a caulk remover or knife. Be sure all sealant is completely removed and the area has been thoroughly cleaned and dried. Apply new sealant with a caulking gun held at a 45-degree angle. Keep even pressure on the caulking gun’s trigger to apply a smooth even bead around the entire fixture. Use a caulk finishing tool or dip your finger in water to smooth the bead and create a neat finish. Clean the area thoroughly to ensure any spilled sealant doesn’t dry. After the initial application has dried, double-check your work for any gaps or cracks that should be filled. You should also consider having an HVAC technician evaluate ventilation of the space.
Watch the video below for more information on replacing bathroom sealant, and be sure to use a high-quality product that is specifically designed for use in bathrooms.